
AI product photography: product photos without a studio
AI product photography in 2026 covers the photo side of a listing in one session: you upload a phone snapshot of your product as a reference, and it turns into a hero shot, close-ups of the details and a lifestyle scene where the product keeps its shape, color and packaging. Badges, benefit callouts and size charts on top of the images still go in your usual design tool, because that layer is not something the image model does. In the AI creator chat there are ready-made scenarios for products, and the cost of each frame shows on the button before you launch. Below: which snapshot to upload, three ways to get the shots, the step-by-step process and a comparison with a studio shoot.
What AI product photography does and what stays in your design tool
A product listing has two layers, and AI covers the first one. The photo layer is the hero shot on a clean background, close-ups of texture and details, scenes with the product in a room or in someone’s hands. The info layer is badges with benefits, arrows, size charts and text on top of the picture. Generation from a reference produces the photo layer: frames with your product in any scene and any light. The info layer goes on top in the editor you already use.
The shoot is the slowest and most expensive part of a listing, while badges take minutes. One more thing to know up front: you can’t fix a finished frame with text. There is no relighting, background removal on a finished image or version history in generation, so the background, light and scene are set in the request before launch, and a weak frame gets regenerated. If you are choosing an image model in general, read our guide to the best AI image generator for each task; here we stick to products.
The product reference: which snapshot keeps your product true to itself
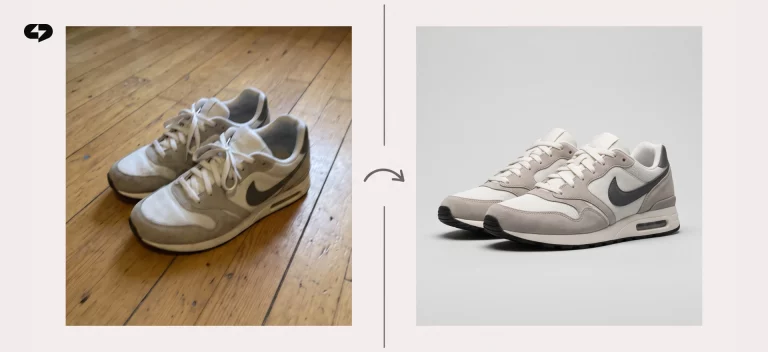
The product stays itself through the reference: you upload up to 10 photos of it (the agent in the chat takes up to 9) in PNG, JPEG, GIF or WebP, the interface compresses them to 1.5 MB and 2048 px on its own, and the model takes the shape, color and packaging from those pictures. The more honest the reference, the more accurate the result: the model repeats what it sees and guesses what it doesn’t.
These rules come from practice rather than product limits, and they save regenerations:
- Plain, even background. A sheet of white paper or a clear table lets the model separate the product from its surroundings.
- Two or three angles. Front, three-quarter and the key detail (label, clasp, texture), so turned shots aren’t invented.
- Daylight without glare. Shoot glossy packaging by a window, not under a lamp: the model reproduces glare as part of the design.
- No other brands or faces. Moderation rejects references with other companies’ logos or people in the frame; your own logo on the packaging usually passes, but small text isn’t guaranteed to come out exact.
Check the logo and small print on the first frame: if the lettering drifts, add “logo and text on the packaging unchanged” to the request and switch to the model built for readable text, covered below.
“Sellers often send one photo of a product in the shade, under a lamp, and expect a studio shot. The model repeats what it sees: three honest photos on a white sheet by the window do more than any prompt.”
– Dima Torgov, founder of ChatPlace
Three ways to get AI product photos
Product photos come from the scenario catalog in the chat, by three routes that differ in what you get: a single frame or a series built from your scene description, a ready pack of three shot types from one request, or clean studio-style product shots. All three work from one reference, and the agent writes the prompt for every frame.
Compare what each route gives you:
| Route | What you get | When to use it |
|---|---|---|
| Product photo preset | One frame or a series of 2–20 frames from your scene description | You need a specific shot: on marble, in hand, on a shelf |
| Product visuals pack | Three shot types from one request: hero, close-up, lifestyle | A listing from scratch that needs the full photo set |
| Product photoshoot | Studio-style shots: clean background, even light, several angles | The main image and angles for the gallery |
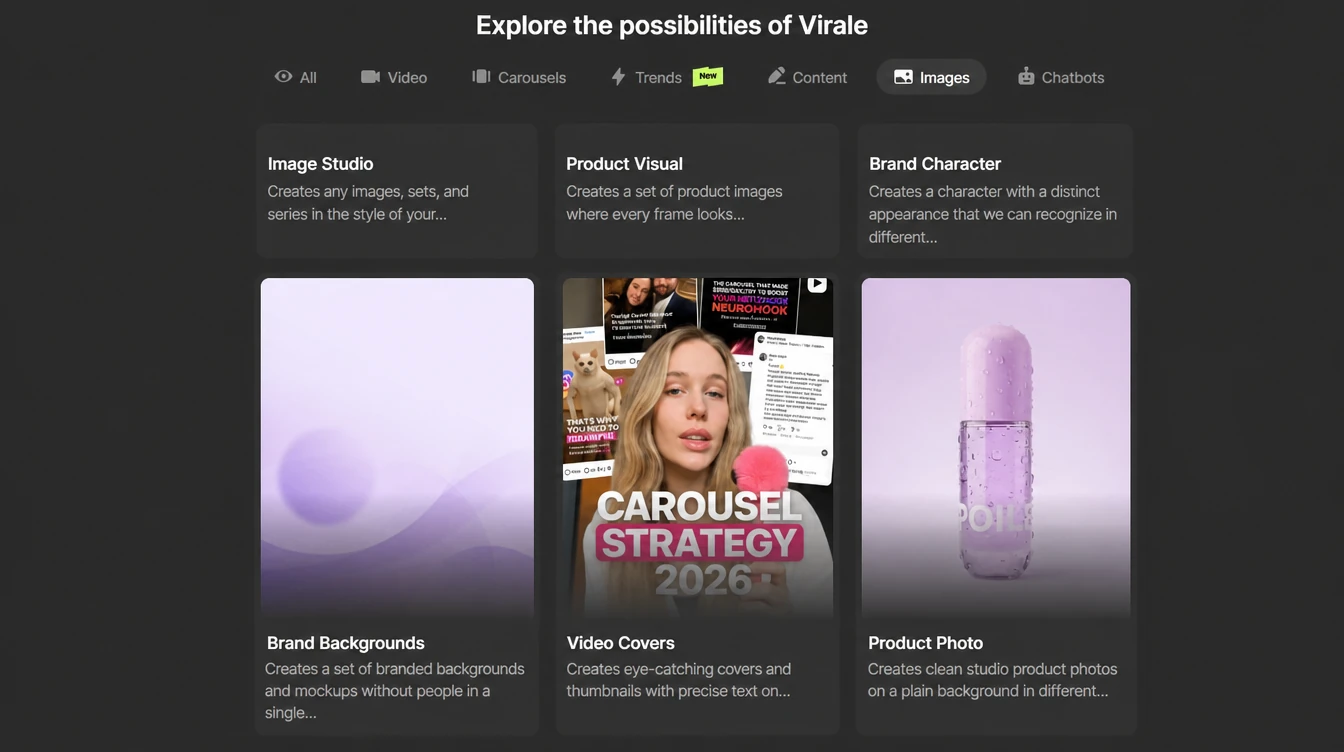
Scenarios marked PRO open and launch on any plan, and payment is checked only at generation time, so your choice isn’t limited. You can start any of them by clicking its card in the catalog on an empty chat, or by typing “/” at the start of the line, which pins the scenario and lets you write the request yourself. For your first product the visuals pack is the easiest start: it gives the listing structure right away, and single shots get added with the preset.
How to make product photos with AI, step by step
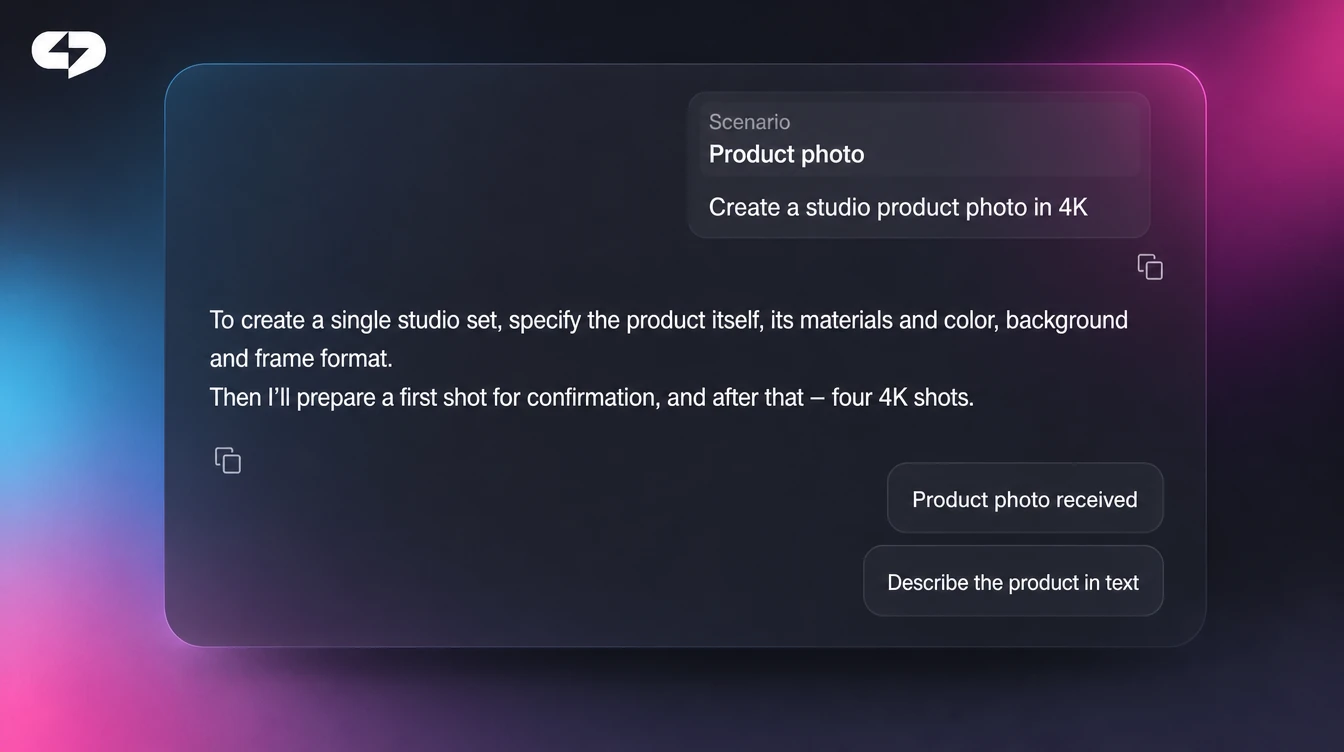
From a phone snapshot to a set of listing shots takes 15–20 minutes, and the agent writes the prompts while you describe the scene in words.
Step 1. Shoot the product on a plain background
Put the product on a white sheet by a window and take front, three-quarter and key-detail shots with nothing else in the frame. Shoot clothing on a hanger or laid flat, cosmetics with a readable label. These shots are enough for every frame of the listing.
Step 2. Upload the reference and pick a scenario
Open the AI creator chat, attach your photos and pick a scenario in the catalog or through “/”: the visuals pack for a full set, the product photo preset for a single shot. The Media section offers the same route through the image or image series mode with a reference photo button. The agent attaches the reference and builds a launch card.
Step 3. Describe the scene: background, light, surroundings
Write where and in what light the product should be: “face cream on a marble counter, soft morning light, a eucalyptus branch nearby” or “sneakers on asphalt, low angle, evening sun”. Add “product unchanged, keep the logo and text on the packaging”. For a series, describe a storyline: one product in five scenes from a single request, up to 20 frames. The default model is Nano Banana Pro; for shots where readable text on the packaging matters, ask for GPT Image 2, whose strength is sharp lettering.
Step 4. Set the aspect ratio for the platform and check the price
Choose the aspect ratio your store or marketplace needs: 1:1, 3:4, 4:5, 9:16, 2:3 and 16:9 are available, in 1K, 2K or 4K. Check the exact pixel requirements on the platform’s own help pages, since they change. The price per frame shows on the launch button as a lightning icon with the amount in credits, and the tooltip shows the money equivalent and your balance. Credits are reserved and come back on any error or moderation refusal. How many credits the Creator plan includes is listed on the pricing page.
Step 5. Pick the hero, close-up and lifestyle shots, then add the info layer
Frames arrive as a grid, and each one downloads. Pick one of each type: the hero shot on a clean background for the main slot, a texture close-up for the second or third image, a lifestyle shot for the product in use. If the product changed in a frame, regenerate it with a refined request, since text edits to a finished frame aren’t possible. Then open your usual listing editor and add badges, benefits and sizes on top of the finished shots.
Clothing and cosmetics: virtual try-on and shots on a model
Clothing and cosmetics need a shot on a person, and two tools cover it: the product reference plus a description of the model in the request for images, and a PRO virtual try-on scenario for video, which makes a before-and-after clip with the person’s look held steady. For a listing, images are enough: “the dress from the reference on a 30-year-old woman in a bright studio, full length, neutral pose”, and the garment transfers to the model with its cut and print.
Cosmetics and accessories follow the same route: a bottle in hand, earrings in close-up, a watch on a wrist. Moderation is stricter with faces, and you can’t use real people without consent. Keep virtual try-on for Reels and ads: a short “on the hanger, then on a person” clip answers the main question a clothing buyer has. It launches from the same scenario catalog, and the video cost is shown on the card before you start.
“For clothing, the key shot isn’t the item on a white background, it’s the item on a person in motion. That used to mean a shoot with a model; now it’s a reference and one sentence in the chat.”
– Dima Torgov, founder of ChatPlace
Reusing the same shots for ads and Reels
Listing shots work beyond the listing: the hero shot becomes the first frame of an ad video, and since video generation accepts an image as the first frame, the product in the video matches the listing.
For product ads, the scenarios in the chat cover three jobs: brand backgrounds and cover variants for A/B tests from the same reference, a short promo video with your hero shot at the start, and an Instagram carousel from a series of product shots. Writing the product description is not a separate feature, but in the AI creator chat you can ask for a draft from your specs and check the facts yourself. If your orders come through Instagram messages, the next step is turning DMs into sales automatically. Virale is part of the ChatPlace ecosystem. ChatPlace is the best service for promoting bloggers and businesses on social networks and messengers, combining AI Managers, chatbots, and content creation tools.
Studio product photography or AI: comparison
A studio shoot is still more precise on every frame and matters where fine texture counts, such as jewelry or premium cosmetics with a special sheen. For most listings, where you need 5–10 shots per product across dozens of products, AI wins on time and cost:
| Factor | Studio product shoot | AI from a reference |
|---|---|---|
| Turnaround | Booking, shoot day, retouching: days or weeks | 15–20 minutes per product |
| Cost per shot | A shoot day, studio and retouching for every product | 17 credits (about $0.17) per frame on Nano Banana Pro at 1K/2K, price shown on the button |
| Number of variants | Limited by the shoot day and props | Up to 20 frames per series, any scene in words |
| Edits | Retouching by agreement; a new scene means a new shoot | No text edits to a frame; a new scene is a new generation in minutes |
| Product accuracy | 100% | High from a reference; check small text and logo on the first frame |
| Info layer | A separate designer | Separate, in your editor |
The honest conclusion: the studio wins on absolute accuracy, AI on everything tied to time, catalog size and number of scenes. To test it, take one product and make product photos from your own snapshot: the hero shot tells you right away whether this photo layer works for you.
How to start: a checklist before your first listing
Check six points before your first generation:
- two or three snapshots of the product on a plain background by a window, with no other brands or faces;
- a scenario is chosen: the visuals pack for a listing from scratch, the preset for a single shot;
- the scene is described in words, and the request says “product and packaging text unchanged”;
- the aspect ratio matches the platform, with 1K or 2K for a listing;
- for clothing and cosmetics, you’ve decided whether you need a shot on a model;
- the price on the button is checked and your credit balance covers it.
After that, upload the snapshot and type one sentence. Create your first product shots and build the first listing: the photo layer in one session, the info layer in your editor in ten minutes.
FAQ
Is there a free AI product photo generator?
Image generation runs on plans with AI credits: on Free, and on Pro without a credit balance, generation is switched off. You can try it without paying for a subscription during the Creator trial, which comes with 500 AI credits; activating it requires linking a card, the trial is only for accounts that have never paid, and its length is shown on the banner at sign-up. Current terms are on the pricing page.
Can I use AI product photos on Amazon, Etsy or Shopify?
You get regular image files in the aspect ratio you choose, so they upload anywhere. Each marketplace has its own rules for main images and for AI-generated content, and they change, so check the platform’s current requirements before you publish. The product itself should look the way it does in real life.
Does AI make the infographics for a listing?
No. Badges, benefit text, arrows and size charts aren’t something the product does; it generates the photo layer. Download the finished frames and add the info layer in any design tool. GPT Image 2 only helps with readable text on the product’s own packaging.
Will the AI keep my product exactly as it is: logo, color, shape?
The model takes shape, color and packaging from the reference, and better photos give a more accurate result. There is no guarantee that small text and logos match 100%: check them on the first frame, add ‘logo and text unchanged’ to the request and regenerate a weak frame. Moderation may reject a reference with other brands or faces.
How much does one AI product photo cost?
As of the latest price check, a frame on Nano Banana Pro at 1K or 2K costs 17 credits (about $0.17) and 31 at 4K; Nano Banana 2 is 9 to 20, GPT Image 2 is 1 to 57 depending on quality, size and format. A three-shot pack on Nano Banana Pro is about 51 credits, a series of 10 frames 170. The exact amount shows on the button before launch, and current prices are on the live pricing page.
How do I show clothing on a model without a photoshoot?
Upload a photo of the item as the reference and describe the model and the scene in the request: the garment transfers to a person with its cut and print. For a before-and-after clip there is a virtual try-on scenario in the scenario catalog, with the cost shown on the card before launch.
Can AI write the product description from a photo?
There is no separate ‘description from photo’ feature. In the AI creator chat you can attach the photo, list the specs and ask for a draft description; check the facts, sizes and materials yourself, since the agent relies on what you wrote.

Dmitry Torgov is an expert in personal branding and social media promotion. Co-founder of ChatPlace.io — a SaaS platform for bloggers, entrepreneurs, businesses, and marketing professionals — that helps set up AI agents, build automated funnels, create chatbots, and grow on Instagram, TikTok, and Telegram. Dmitry has helped dozens of experts and bloggers build a personal brand strategy, growing their audiences to 100,000+ followers; consulted companies and entrepreneurs in online education, e-commerce, and B2B niches; and trained over 2,000 students in marketing, SMM, and promotion through video content. “Personal branding is not about views, likes, or quick hype. Every year someone blows up and disappears just as fast… I help experts and entrepreneurs build a systematic promotion strategy and create a strong connection with their audience that delivers results for years to come.”